Included
Only PCB : Only GK61 /GK61S Type C PCB.
PCB Alu Plate Stabs: GK61 /GK61S PCB + GK61 Alu Plate ( Can choose black silver or gray color ) + OEM Gateron Plate Mounted Stabilizer.
PCB Brass Plate Stabs: GK61 /GK61S PCB + GK61 Brass Plate + OEM Gateron Plate Mounted Stabilizer.
There are no screws between PCB and plate, fixed by switch.
The GK61S PCB is Bluetooth wired dual mode PCB,however we don't put battery inside for shipping issue.
You can prepare a 1.25 pin/ Red black wire/polymer lithium battery.
Details
1.Pls Note: This pcb is fully programmable,however Fn sits at the right of bottom row and place can't change.
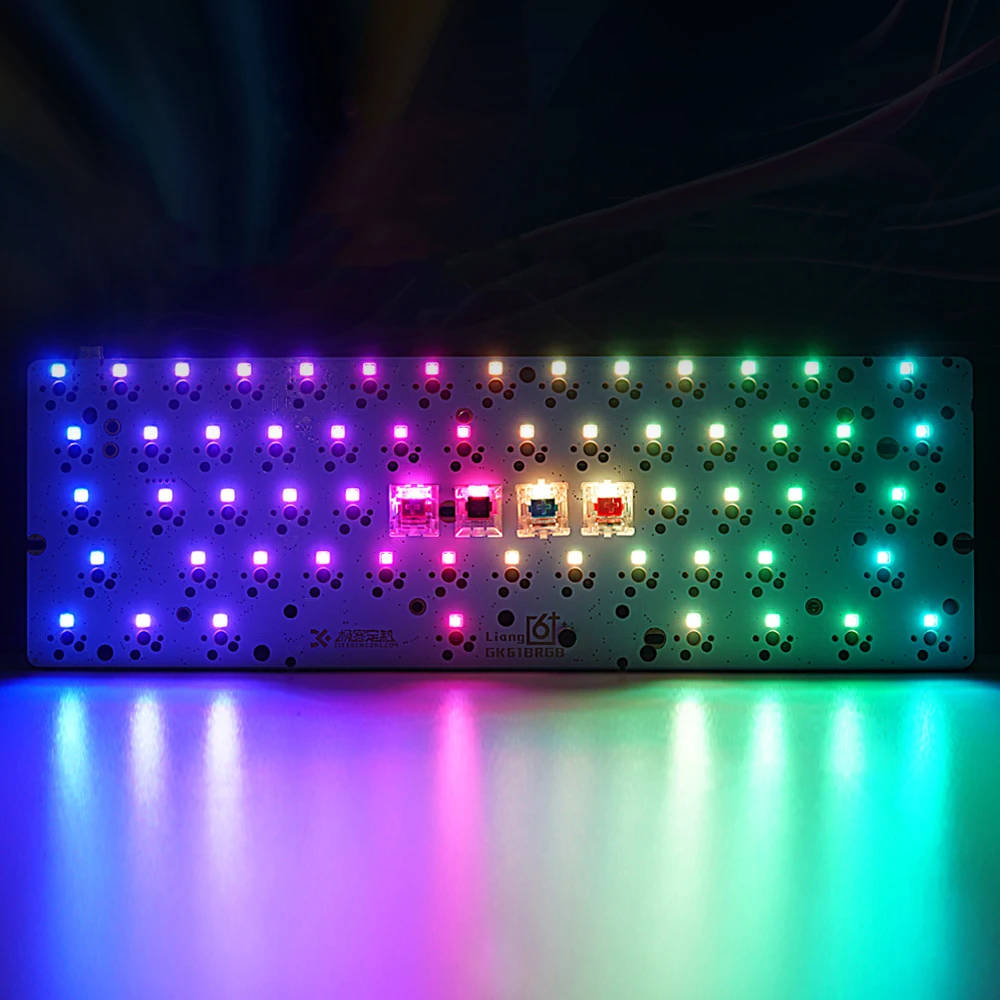
2.PCB have full switch RGB,support programmer,can support by music.
The chipset is MCU 32 bit,8M Flash,3 pcs 256*256*256 RGB drive to support full 16.8 million RGB.
3.About Size compatibility issues:
The pcb size is 287x95mm.The pcb size is 287x95mm.
Measure your case before ordering it since many new case can't put this old PCB in.
The plate screw hole to attach PCB plate together can't match 100%.
However It does't need to use this screw hole as a must.
You can just install as the below method is ok directly.
This PCB is little bigger than new GK64x.
It can be used with most GH60 case in our store.It's also be ok with Tofu60 case
This PCB is can't use with newest GK case,such as Diamond case.
To install GK61 PCB,pls use brass bolt and M2-6 screws.Acylic case is CNC frosted,Aluminum case is CNC anodized.
4.PCB is programmable with the software below (Can download on official website)
drive.google.com/file/d/1D2G4_r_v9CkQuEf98RXLclmc_bY5L5xr/view?usp=sharing
Some compatible Case in the store
1.GH60 Plastic Case : Here
2.GH60 Wooden Case A : Here
3.GH60 Alu Case Low Profile : Here
4.GH60 Alu Case High Profile : Here
How to install PCB plate kit
1.Install stabilizers to PCB at first
2.Amount around 5-6 switches onto plate corners and middle part totally
3.Amount these switches pin to PCB socket totally.
After PCB plate fixed,plug other switches in around 90 degree is ok.
When plugging you can put PCB onto desk which can avoid big damage when plugging switches.
4.If there is any big resistance when plugging switches,especially when you use kailh switches,don’t put it in forcely.
Make sure the switch pin is not bent and the switches is around 90 degree.
5.After plugging switches,if 1 or 2 key not working,check the switch pin whether it’s bent at first.
Then check whether the back socket is plugged loose.
Even hotswap PCB don’t need to solder as normal,however the socket is easily to be plugged loose or off after many times
replacing,so if you can prepare a cheap solder iron in hand,1 hotswap PCB can use for many years.We sold many brand hotswap
PCB now,these are experience from many customers.


