M.NT68676.2A(HDMI+DVI+VGA+Audio) LCD/LED Screen Controller Board Lvds Inverter Kit Converting a LCD Panel 1680X1050 CLAA220WA01D into MonitorThis is a great set of easy-reassembling LCD controller kit which is used to turn a bare LCD panel SVA190WX02TB into a desktop/PC monitor. It will be a surprise that your bare LCD will be of good use, and no longer be a waste. Or it is a very insteresting things that we make a monitor successfully by ourselves. Giving your lcd panel a new life with your own idea. Plug&play kit, no need soldering. Note: This kit is for CLAA220WA01D , if your lcd model number is different from it, please remember to contact us with lcd model number for suggestion. Necessary Accessories for turning a bare LCD to desktop monitor: 1. LCD Controller board
2. Inverter
3. LVDS cable
4. Keypad
5. VGA cable/DVI Cable/HDMI cable(not included)
6. Power Adapter(not included)
If you have already had a VGA cable/DVI cable/HDMI cable and a power adapter , this kit is a great choice for you, else there are some other kind of kits for options in our store, please feel free to contact us for suggestion. LCD Controller Board M.NT68676.2A: 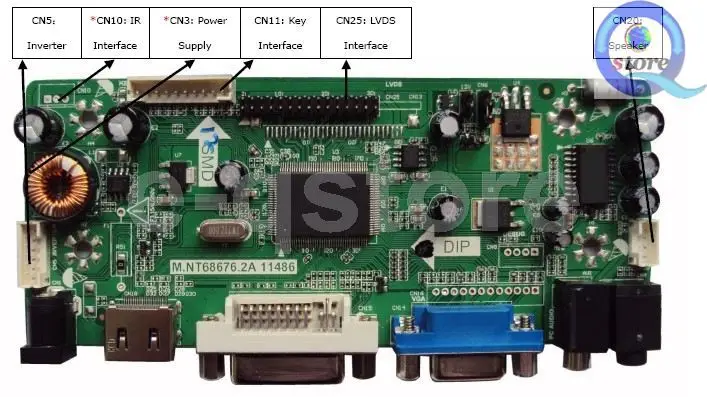
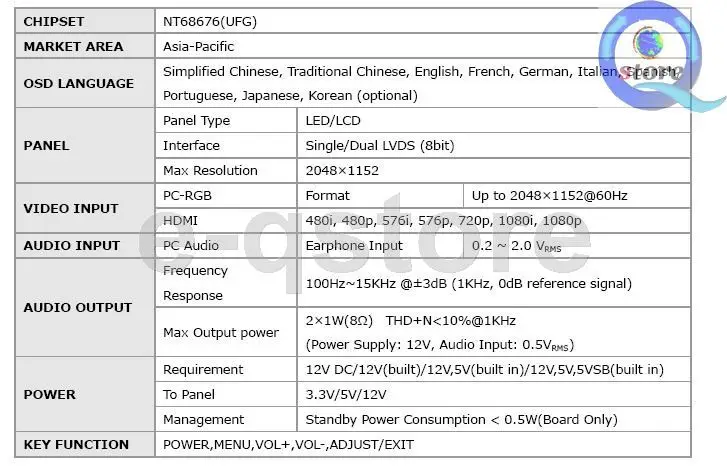
M.NT68676.2Ais a monitor control board, which can support LED/LCD panels. It can support resolution up to 2048X1152.
M.NT68676.2Acan synchronize with computer automatically. Synchronization requires the synchronous signal which horizontal and vertical sync are separated.
M.NT68676.2Acan support dynamic contrast control, headphone input and digital volume control simultaneously.
Size of controller board:139mmX58mmX17mm 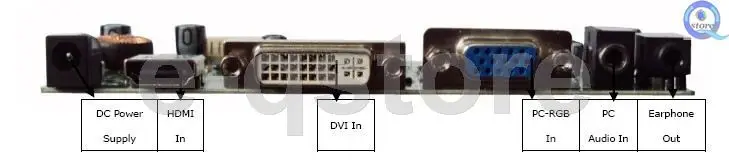
Have a try and you will get great surprise Then, are you going to get this kit? Notes: 1. Please make sure that your LCD is ok before bidding this item, else you will be responsible for the incompatibility. 2. If you concern much about resolution setting, please reconsider before bidding 3. If you are not specialized in electronics or have doubts in operation, please contact us for instruction, as we are not able to responsible for wrong operation. 4. After finishing the connecting, please don&x27;t rush to power on First, use multi-meter to test whether the GND of the LCD is connected with the GND of the controller board. If not, please check the connection again. If yes, please test whether there is a short circuit between the red wires and black wires of the LVDS cable. If there is a short circuit, it means opposite connection or other errors. Any problem, please feel free to contact us. DIY needs a certain professional knowledge, please kindly take the responsibility of the risk. No metal contact is allowed when powering on the controller board, otherwise short circuit may occur, which may cause unavailability of the controller board.
American Friend cryalith&x27;s Raspberry PI Computer: 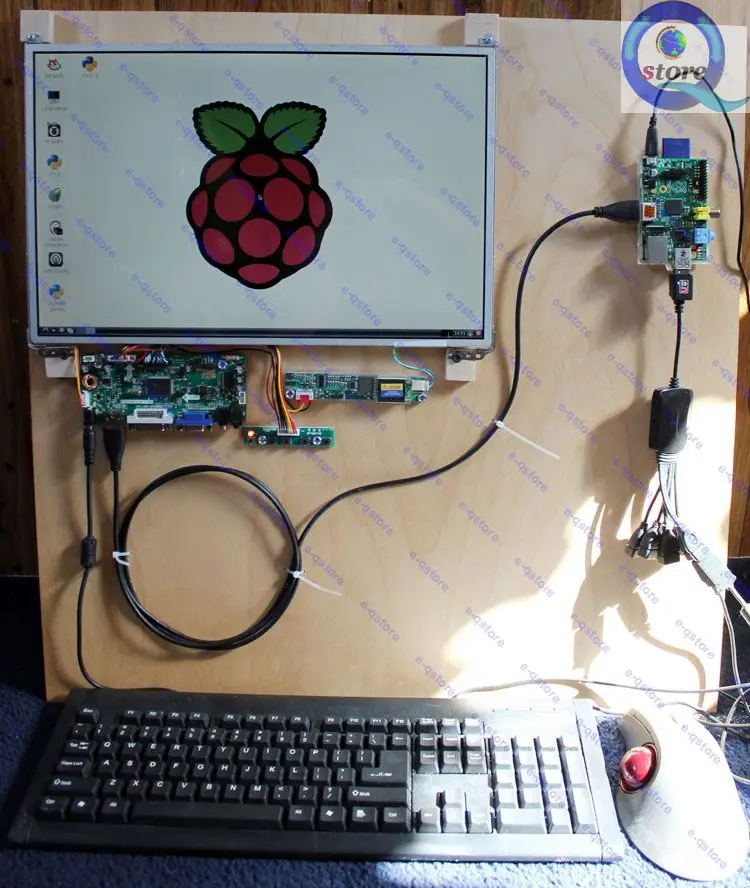
Australian Friend beyelka&x27;s Project: 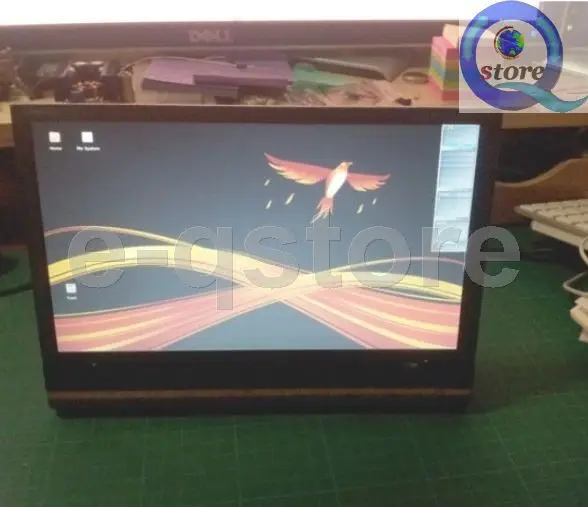
Successful Example (radicalboy_fr -- a French friend&x27;s Project ): 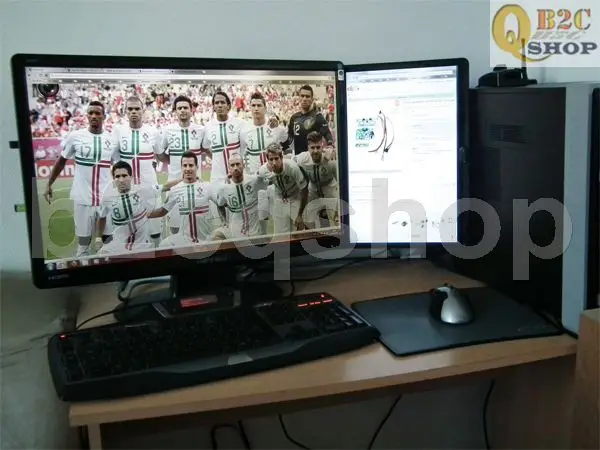
Successful Example (docpot2008 -- a Canadian friend&x27;s Project ): 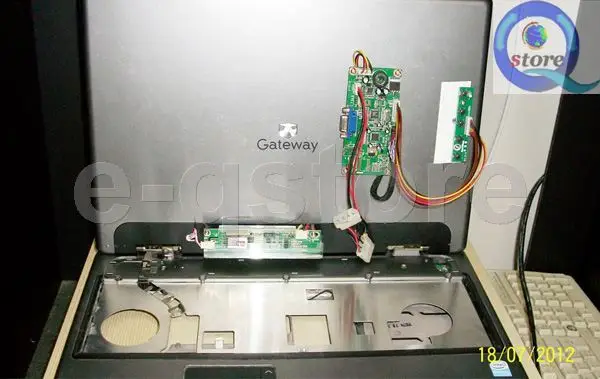
Malta Friend drac1977&x27;s Project: 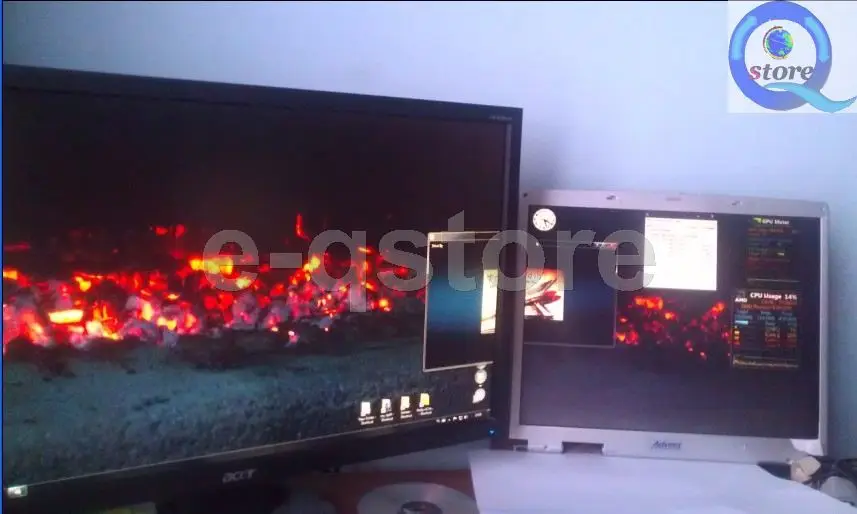
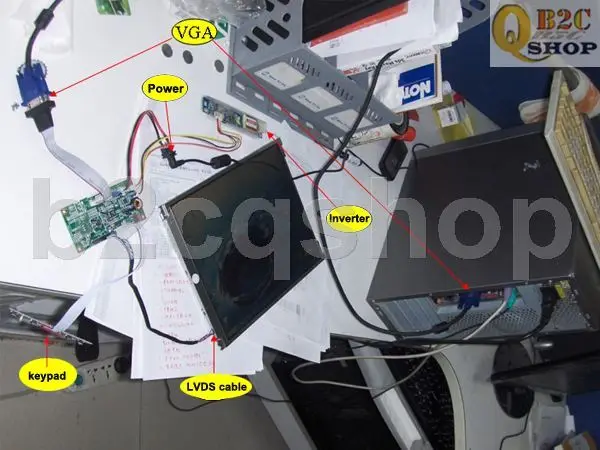
Instruction to connect the controller board to the LCD (The connection is for reference): 
Do remember that "No metal contact is alllowed." Take away the old inverter and old LVDS cable from the LCD panel. Connect the new inverter and LVDS cable to your LCD panel. Connect controller board with PC by VGA cable/DVI/HDMI cable. Input power of 12V,4A. (Please don&x27;t revised the voltage jumper setting on the lcd controller board before confirmation from us, because wrong revising of this voltage will get your lcd burnt. By the way, please don&x27;t connect the lvds cable wrongly, some wrong connecton can get your lcd burnt too, if you are not sure, please feel free to contact us.)
Package Include: **** The supplier may update of the lcd controller boad a little, so they may be not the same as that shown in the picture. Hope for your understanding. Welcome to customize your own kit |